Magento 2
Learn how to integrate us into the Magento platform to provide our payment option to your customers.
Overview
Magento is an all-around e-commerce platform that allows you to build your own online store. Here we describe the steps to successfully integrate PayBright into the Magento platform.
Once integrated with PayBright, your Magento website will:
- Offer PayBright as a payment option on the checkout page
- Display PayBright's promotional messaging and prequalify widget
- Allow you to manage PayBright transactions in your order management system
Configuring PayBright
This following will guide you through configuring PayBright at checkout in Magento.
PayBright Prequalify Widget
Let your customers know that they can buy now, pay later by installing the PayBright Prequalify Widget on your product and cart pages.
Adding PayBright to your Magento 2 store (ver 2.3-2.4)
Step 1. Download the Magento package.
Download PayBright's Magento package from following url:
[PayBright-Magento-Plugin]
(https://marketplace.magento.com/paybright-module-payment.html)
Step 2. Upload the file to the root directory.
Unzip the file you downloaded in Step 1 into a temporary directory. Move the contents of the package to our Magento installation's root directory.
Step 3. Disable the Magento cache.
It is important to clear the Magento cache in order for the changes to take affect. You can clear the cache from:
System > Cache Management
Step 4. Install the plugin using the command line.
Run the following commands in your command line to install the Paybright plugin:
- php bin/magento module:enable PayBright_Payment
- php bin/magento setup:upgrade
- php bin/magento cache:clean
Step 5. Configure the PayBright module from Magento's admin panel.
You can view the installed PayBright plugin by going to:
Stores -> Configuration -> Sales -> Payment Methods
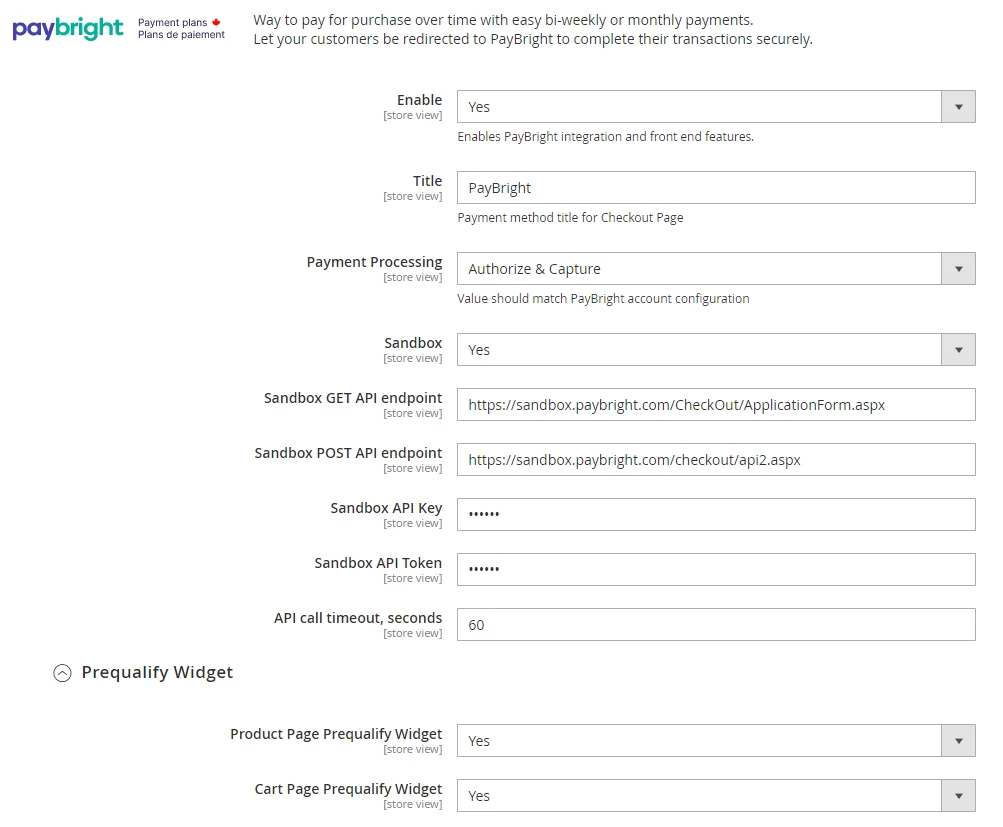
Your PayBright configuration settings will look like this:

Step 6. Begin testing.
You will be provided with a Sandbox API Key and a Sandbox Token by the PayBright Merchant Success team. If you have not obtained your testing credentials, please contact us at [email protected]. Access will also be given to your Sandbox PayBright admin portal (which is a separate entity from Magento).
To begin testing, ensure that the "Sandbox" setting is toggled to "Yes." Enter your Sandbox API Key and Token in the corresponding fields. Check that your "Payment Processing" setting (either "Authorize" or "Authorize and Capture") matches the settings you have discussed with your PayBright contact. If you are not sure which setting you should use, contact Merchant Success at the above email address.
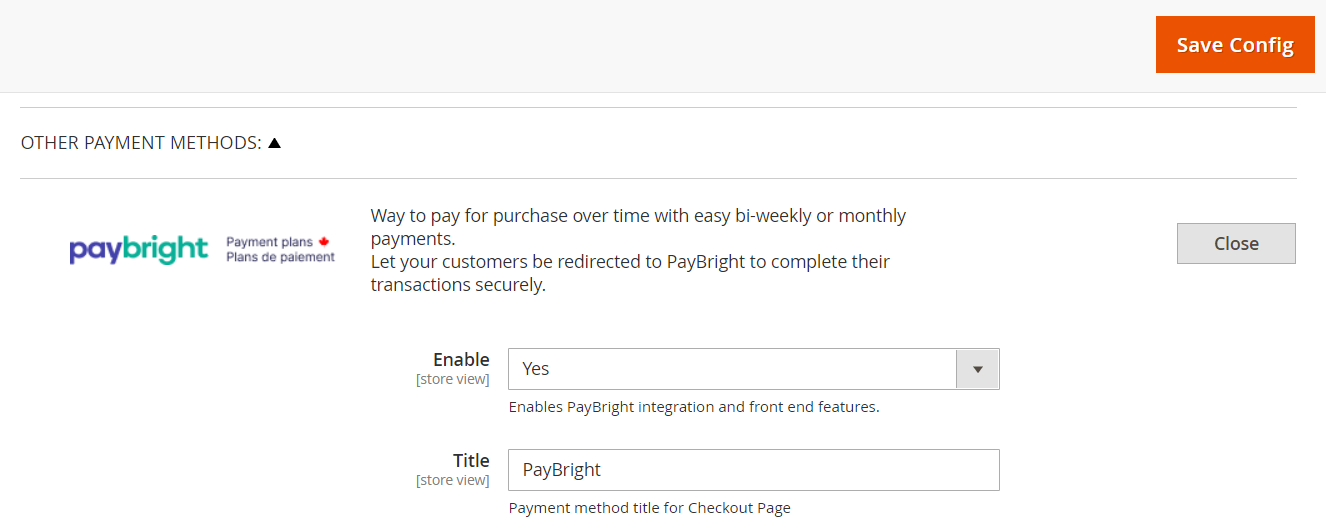
Make sure that the "Enable" setting is set to "Yes" and then click the "Save Config" button at the top of your screen (shown below) to store this information. You will need to click this button any time you change information on this page.

Step 7. Activate the Prequalify Widget.
If you would like to enable the Prequalify Widget (a marketing tool which transforms a purchase amount into installments), you can simply enable it to show on your product pages, cart page, or both, by clicking on "Prequalify Widget" in your PayBright settings. Once these are enabled, refresh your store to see the Prequalify Widget on the pages you have selected. Note that while the Sandbox setting is set to "Yes," the Prequalify Widget will also be in test mode.

Step 7. Go live!
Once you have finished testing by completing transactions using your PayBright test customer credentials, you can request your production API Key and Token from the Merchant Success team along with your production PayBright portal credentials.
In your configuration area, toggle the Sandbox setting to "No" and enter the Production API Key and Token in the corresponding fields. When you are going live, it is recommended that you clear your Magento cache to ensure that the change is reflected in your store.
To clear your cache, go to System > Tools > Cache Management and click the option to Flush Magento Cache.

Updated over 4 years ago